Category

Washing Machine Repair

Appliance Repair

The Complete Home Appliance Repair & Maintenance Guide (2026)

By Appliance Maintenance, Dishwasher, Dishwasher problems, dryer repair sign, dryer repair tips, Refrigerator problems, Repairing, Washing machine, Washing Machine Repair
It is evident that appliances make life so easy since they enable us to store food, do laundry and washing dishes. Nevertheless, despite being durable and efficient, there comes a time when we need to fix them and maintain them. Knowledge on how to fix and maintain an appliance and when it should be repaired or replaced may save you hundreds of dollars a year.
Home Appliance Repair and Maintenance Manual (2026) will provide you with information on the maintenance process and all problems related to household appliances including whether to repair or change the appliance and other things.
Why is Maintenance of Appliances Necessary?
Homeowners tend to call professionals only when their appliance malfunctions completely.
Regular home appliance maintenance gives you such benefits as:
  • Increased appliance durability
  • Fewer costs on repairs
  • Better energy efficiency
  • No surprise breakdowns
  • Safety of your home

Maintaining the appliance performance according to manufacturer specifications

Maintenance is always cheaper than appliance repair.

Life Span of Key Household Appliances

Knowing the life span of your appliances will make it easier for you to choose whether to repair an appliance. In addition, proper maintenance can often add several years to these estimates.
Refrigerator 10–15 Years
Dishwasher 8–12 Years
Washing Machine 10–15 Years
Dryer 10–13 Years
Oven & Range 13–18 Years
Microwave 7–10 Years
Garbage Disposal 8–15 Years
Freezer 12–16 Years
Overall, proper maintenance can often add several years to these estimates.

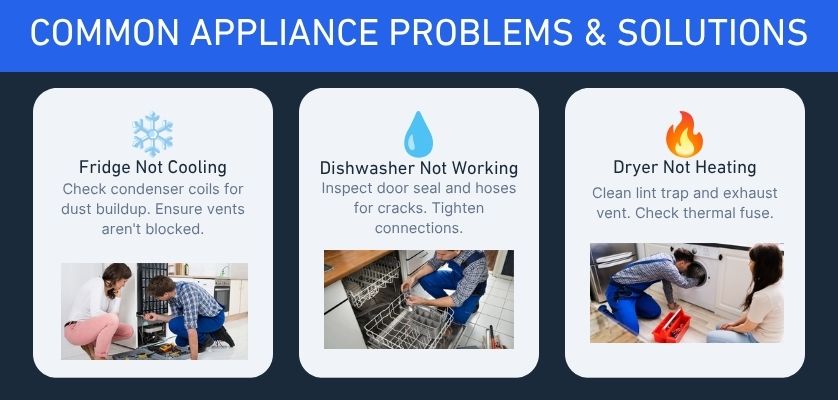
Common Appliance Problems and Solutions

Not Cooled Refrigerator

A frequently seen problem with refrigerator repairing is the case of a warm refrigerator and cold freezer.

Causes

  • First, accumulation of dirt in the condenser coils.
  • Additionally, obstruction in the air vents.
  • In some cases, problematic evaporator fan.
  • Moreover, defrost system malfunctions.
  • Finally, broken compressor.

Maintenance

  • First, clean condenser coils every six months.
  • Next, clear air vents.
  • Also, test door seals.
  • Finally, maintain the temperature of 37–40 °F.
As a result, regular maintenance helps prevent costly refrigerator repairs.

Washing Machine Problems

Washing machines have high utilization and wear out. Therefore, routine maintenance is essential.

Common Trouble Spots

  • Won’t spin
  • Won’t drain
  • Water leaking
  • Too much vibration
  • Foul odors

Maintenance Tips

  • First, do not overload.
  • Next, perform monthly cleaning of the drain filter.
  • Also, keep the door open after each cycle.
  • Finally, use correct detergent.
Consequently, regular washing machine maintenance avoids costly repairs.

Dryer Doesn’t Heat

One of the most frequently searched appliance repair troubles is a dryer that runs but does not heat. However, this issue is often caused by a few common problems that can be identified early.

Reasons

  • First, failure of the heating element.
  • Additionally, fused thermal switch.
  • Moreover, obstruction of the dryer vent.
  • Finally, thermostat defect.

Maintenance Tips

  • After each load, clean the lint trap.
  • In addition, clean the dryer vents once per year.
  • Finally, avoid overfilling the drum.
As a result, cleaned dryer vents help improve performance and prevent fire hazards.

Dishwasher Troubles

Dishwashers become prone to drainage and cleaning troubles.

Symptoms

  • Water standing
  • Unwashed dishes
  • Foul smell
  • Water leaking

Prevention

  • Weekly filter cleaning.
  • Once per month use dishwasher cleaning.
  • Clean scraped dishes before loading.
  • Periodically check the spray arms.

Oven/Stove Trouble Spots

Kitchen appliances need regular maintenance as well.

Trouble Spots

  • Doesn’t heat
  • Baking unevenly
  • Burners won’t light
  • Temperature readings incorrect

Maintenance Tips

  • Clean up spills right away.
  • Replace faulty burner igniters.
  • Temperature calibration once a year.

Indicators That Your Appliance Is Needing Repair

Many appliances give off signals before they break down altogether.
Look out for:
  • Screaming noises
  • Odors of burning
  • Leaking water
  • High electricity bills
  • Cycling too often
  • Working slowly
  • Indicating error codes
  • Spoiled food
  • Clothes not drying
  • Ineffective cleaning cycles
Ignoring these signs can lead to bigger repair bills.

Appliance DIY Troubleshooting Guide

Before you call an appliance repair service, try these simple troubleshooting steps.

Check the Power Source

  • First, inspect the electrical outlet.
  • Next, examine the circuit breaker.
  • Also, inspect the power cord.

Check the Airflow

  • Finally, clean the air vents.
  • In addition, remove any obstructions.
  • If necessary, inspect and clean the filters.
Or, if you prefer a bullet-list style:

Check the Power Source

  • Inspect the electrical outlet.
  • Examine the circuit breaker.
  • Look for damage to the power cord.

Check the Airflow

  • Clean the air vents.
  • Remove any obstructions.
  • Inspect and clean the filters.

Choose Repair When:

  • Your appliance is less than 8 years old.
  • The repair costs less than half the price of a new one.
  • Replacement parts are easy to find.
  • Your appliance still works well.
  • Only a small part needs to be fixed.

Choose Replacement When:

  • Your appliance is older than its expected life.
  • The compressor or motor has failed.
  • It needs repairs many times each year.
  • Your energy bills keep getting higher.
  • The repair costs more than buying a new appliance.
A trusted appliance repair expert can help you choose the best option.
An experienced appliance repair service will guide you in making your choice.

Annual Appliance Maintenance Checklist

Using a seasonal maintenance schedule helps keep your appliances in excellent condition throughout the year.

Spring

  • First, clean your refrigerator’s coils.
  • Next, inspect your washing machine’s hoses.
  • Also, inspect the vent of your dryer.
  • Finally, clean your dishwasher filter.

Summer

  • During summer, inspect the refrigeration function of your fridge.
  • In addition, clean the freezer coils.
  • Then, inspect the ventilation function.

Fall

  • As the weather changes, clean your oven.
  • Next, inspect your smoke detectors near appliances.
  • Also, inspect your electrical cords.

Winter

  • Before winter, inspect your door seals.
  • Additionally, avoid freezing of your water lines.
  • Finally, do preventative maintenance of your appliances.
Overall, using an annual checklist will help prevent emergencies.

How to Extend Appliance Lifespan

Simple things matter greatly. For example:

Refrigerator

  • Avoid packing up shelves.
  • Also, service coils biannually.
  • If needed, replace faulty door seals.

Washing Machine

  • Load clothes evenly.
  • In addition, use HE soap.
  • Furthermore, clean the tub each month.

Dryer

  • Clean the lint filter after each cycle.
  • Additionally, check ventilation every year.

Dishwasher

  • Clean spray arms.
  • Also, use rinse additive.
  • Finally, remove food bits.

Oven

  • Avoid harsh chemicals.
  • Instead, clean spills instantly.
  • If necessary, replace broken seals.

Advantages of Professional Appliance Repairs

While DIY maintenance is helpful, professionals have many benefits.
Professional appliance repairs offer:
  • Correct diagnosis
  • Authentic replacement parts
  • Protection under warranty
  • Safe electrical repairs
  • Increased appliance lifespan
  • Better efficiency
Furthermore, hiring an expert appliance repair company will save you from the extra harm done by incorrect appliance repairs.

How to Select a Proper Appliance Repair Company

Not all repair companies have the same expertise level. Therefore, choosing the right service provider is important.

What should you look for?

  • First, licensed specialists
  • Next, same day service
  • In addition, good reviews of customers
  • Also, warranty for repairs
  • Furthermore, experience with popular brands
  • Moreover, reasonable prices
  • Finally, emergency repairs
As a result, selecting a good local appliance repair company will ensure your safety.

Appliance Maintenance Mistakes Most People Neglect

The majority of malfunctions occur simply because basic maintenance procedures are neglected. Therefore, remember to:
  • First, vacuum the refrigerator coils twice per year.
  • Next, change any broken water supply lines.
  • Also, wash the washing machine filters on a monthly basis.
  • In addition, take out the lint buildup around the dryer.
  • Furthermore, check the appliance cords for damages.
  • Moreover, keep the appliances at the correct level.
  • If necessary, change any damaged door seals.
  • Finally, schedule an annual maintenance visit by a professional.
In the long run, all these steps will help you minimize your appliance repair costs.
The majority of malfunctions occur simply because basic maintenance procedures are neglected.

Remember to:

  • Clean the refrigerator coils twice a year.
  • Replace broken water lines.
  • Clean the washing machine filter every month.
  • Remove lint from the dryer.
  • Check power cords for damage.
  • Keep appliances level.
  • Replace worn door seals.
  • Get a professional inspection once a year.
These steps are easy to follow. As a result, they help prevent breakdowns. You can also lower repair costs. In addition, your appliances will last longer.

Conclusion

Appliances are expensive purchases, and therefore proper appliance care is crucial. Regular maintenance and repair services will help to increase the lifespan of your refrigerator, washer, dryer, dishwasher, oven and many other appliances.
Although some faults can be rectified through maintenance hacks, it is imperative that all recurring faults are fixed by an appliance repair specialist to guarantee efficiency of your appliance in the years to come, such as in 2026.

Frequently Asked Questions

How often should I service my home appliances?

Most major appliances should be inspected and cleaned at least once a year. High-use appliances like dryers and refrigerators benefit from more frequent maintenance.

What is the most common appliance to break down?

Refrigerators, washing machines, dryers, and dishwashers are among the most frequently repaired household appliances due to regular daily use.

Is appliance repair cheaper than replacement?

In many cases, yes. If the repair costs less than 50% of a new appliance and the unit is relatively new, repairing it is usually the better option.

What appliances require regular maintenance?

Refrigerators, washers, dryers, dishwashers, ovens, freezers, and garbage disposals all require routine cleaning and inspection to maintain peak performance.
washing machine repair cost

Washing Machine Repair Costs That Keep Your Wallet Happy

By Washing Machine Repair

Washing machine problems often worry homeowners in Hollywood and beyond. But what brings the trouble? It’s the washing machine repair cost. However, we have another side of the story. What if an early washing machine repair saves you big later? Moreover, ignoring the repair keeps adding up the expense. So, stay with us as we spill the beans on pricing.

Washing Machine Repair Cost: What’s Behind the Price Tag?

Everything starts with a cost breakdown. After all, it’s better you know what you will pay for. Firstly, the cost depends on the type of washing machine repair. Are you looking for those minor fixes, like replacing a hose? That’s less expensive than complex situations like drum or motor issues.

Next, the cost of parts affects your overall washing machine repair cost. By that, we mean original manufacturer parts cost you more bucks. Thirdly, we can’t overlook the labor costs. Here, technicians charge based on experience and time they invest in the job.

Long-Lasting Effects of Professional Washing Machine Repair

Next, let’s see how professional washing machine repair makes a difference.

Expert Inspection– Professionals can pull out those hidden issues you may overlook. As a result, these issues won’t turn into bigger chaos later.

Quality in Every Step– Experts use high-quality parts that can easily last longer. That way, your washing machine gets back to a good working state. Also, they improve reliability and help avoid future problems.

Efficiency At Its Best– A professional repair gives your washing machine an efficient boost. It helps reduce unwanted energy usage and water.

No Laundromat Trips– Experts also save you high on laundromat costs. We mean, why pay for laundry services when your washer works? Over time, you can expect better savings.

Top Spots for Top-Notch Washing Machine Repair in Hollywood

So, your search for the best washing machine repair in Hollywood is loading. Great! But how about we save you valuable time and show you the way? The journey starts with the technician’s track record. Experienced pros can take care of multiple washing machine problems.

Next, focus on the expert’s reputation. And here, ratings and reviews would help you greatly. You can also get suggestions from your loved ones. Finally, think about comparing repair prices. While cost matters, quality service is worth a little extra.

DIY Attempt or Pro Repairs: What Satisfies Your Washer the Most?

You may face a moment where you can’t choose between two options. One being DIY and the other being professional repair. Perhaps, you may think of fixing a small leak at home. But what about motor issues or other big problems? In those situations, a professional washing machine repair cost is worth it. After all, everyone expects a long-lasting fix.

Last Word on Washer Repairs: How A Fix Saves You More

In the end, the washing machine repair cost must reflect value. Value with quality fixes and long-term satisfaction. As a result, you can be free from costly expenses later. So, when it’s choice time for quality, go for a professional consultation.

washing machine repair

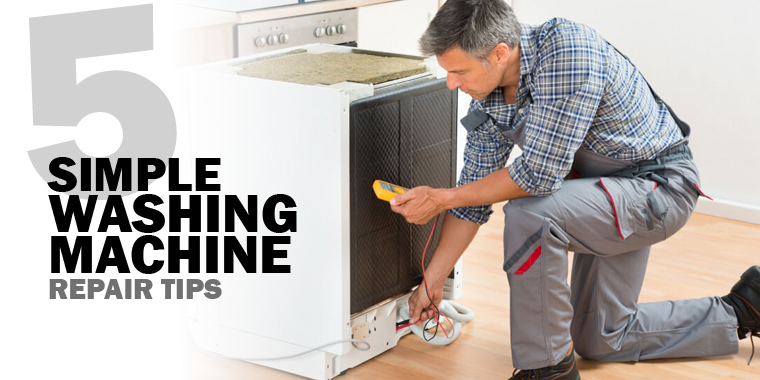
5 Simple Washing Machine Repair Tips

By Washing Machine Repair

Does everyone in your home freak out when the washing machine has issues or suddenly stops operating for no apparent reason? It’s always essential to have clean clothing, and in enormous households, even a few days’ worths of laundry backup is a crisis. However, you may take several easy measures to investigate and typical washing machine repair tips before hiring a repair man.

Few washing machine repair tips before hiring an expert

1. Washer Is Not Filling:

Try to clean the washer

Verify that the valves for hot and cold water are both open. They will either be marked with labels or painted red and blue.
Some machines will only work if both valves are open, even if you can only wash with cold water. Check to see that the valves are completely open if your machine is receiving water but filling slowly.
To get rid of any dirt, use a spray bottle of water to wet the filters. Remove any last bits of dirt or debris with a thin, stiff brush.

2. Vibrating and moving:

Make sure the position is balanced

Make sure the floor is level. If not, place your washer on some plywood while applying shims if required.
Ensure the washer’s feet are present and securely planted on the ground. Level the front two legs if required, then tighten the lock nuts. Self-adjusting rear legs are a feature found on most washing machines. Tilt the washer forward to raise the back legs by about three inches. After that, set the machine down so that the legs adjust independently.

3. Become noisy:

Remove the hose and remove the obstruction.

To reduce noise, the clothing should be distributed evenly across the tub in a top-loading washing machine. So, make sure to fill the tub with high-efficiency top-load washers with a central agitator.
Typically, the load has moved when a top loading machine makes a thumping noise during the spinning cycle. Rearrange the clothing and stop the machine.
In front-loading machines, underloading can cause a noise when one large object is flung around during the last rotation.
An obstruction in the drain pipe may cause a gurgling sound. To prevent a flood, find any blockages and remove them as soon as possible.

4. Bad odours:

Use anti-odours solutions

Top loaders also emit a musty or mildew smell, while front loaders are more notorious for this.
Too much detergent leaves a filthy film that serves as a breeding ground for bacteria and mildew. Run a vinegar solution monthly to clean your machine’s hot water cycle.

5. Leakage:

Verify loose hose connections, the hose condition, etc.

Often, this issue may be resolved quickly by replacing a cheap item.
Check to see that the hose connections are solid and in excellent condition with no fractures. Ensure the hose washers are in excellent condition, free of cracks, and positioned correctly in the hoses. Search for any obstructions in the drain hose.
Ensure there are no leaks in the water pipes. Ensure sufficient drainage from the washing machine. Limit your detergent usage.

You can follow the above-stated washing machine repair tips. consequently, a qualified washing machine repair expert can help if you’ve tried to fix your washer but are still experiencing problems. To get your machine working and simplify things, their knowledgeable appliance repair specialists may arrive quickly — even on the same day.

How to Fix a Squeaky Dryer

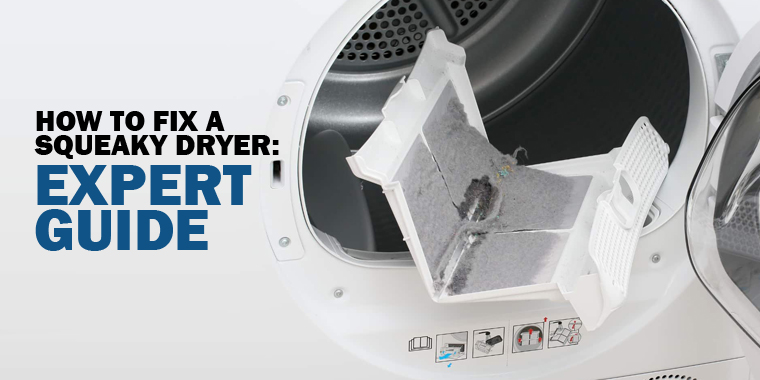
How to Fix a Squeaky Dryer: Expert Guide

By Repairing, Washing Machine Repair

Introduction to How to Fix a Squeaky Dryer

If your dryer makes a lot of noise, doing the laundry might be annoying. Your dryer may squeak due to several problems, including a malfunctioning dryer belt, unlubricated roller wheels, and erosive bearings. You will need to buy replacement parts, get a tool kit, spend time watching dryer repair tutorials on YouTube, or read your dryer manual before you can fix your squeaky dryer.

You must disconnect your squeaky dryer before you start mending it to avoid mishaps and also make sure you have a spacious and spotless work area. Any parts which, accidentally fall to the floor will be visible in a clean space.

A squeaky dryer is a sign that you need to address any issues with the equipment as promptly as possible. If you are a novice, you can contact a professional to assist you in diagnosing the issue with your dryer. It would be beneficial if you were aware that there are several potential causes for the squeaky sounds made by a running dryer.

Until you open the dryer, you might not be able to determine which one you have. The best part is that dryers don’t have a lot of moving parts that could malfunction; as a result, you can simply identify the noisy component.

A few reasons are discussed here for squeaky dryers, along with potential fixes for each.

A defective dryer belt

The dryer drum is encircled by a long, slender rubber belt called the dryer belt. Typically, the pulley is connected to the motor before the belt is fastened to it. The idler pulley will rotate whenever the motor is running, which will turn the drum and the belt.

Depending on how frequently you use the dryer, your belt may suffer from severe wear. Regular spinning could stretch your dryer belt, which would decrease efficiency. The belt will not be able to spin a metal drum if it is not properly fastened to it. It’s not a wise idea to combine metal with loose rubbers. The squeaky dryer sound can be the result of friction between the two components.

You can instantly determine if the squeaky noise is coming from your belt when you open the dryer. Replace the belt if the rubber is found to be loose. Be aware, that you can’t replace anything until you unplug the wire harness plug and remove the mounting screws. You’ll find instructions for doing this in your manual.

It shouldn’t be challenging to replace the old belt once you remove any parts that can obstruct your access to it. The new belt just needs to be looped around the two pulleys in the same manner as the old, pooled belt.

Bearings for Drum Glides

You can have faulty gliding bearings if the noises you hear from the squeaky dryer don’t come from a broken wheel or a piece of loose rubber but rather sound like metal or plastic. A drum’s edges are covered with microscopic nylon, or plastic glides. They are frequently affixed using several locking tabs.

You will need to remove the complete dryer drum if you find that your glide bearings are malfunctioning. As soon as you’ve done that, you can use pliers to aid you in pressing the tab pairs back into their openings and separating the beatings.

Idler Pulley

The idler pulley and the motor pulley are most likely the two pulleys in your dryer. Between the dryer belt and the motor is where you’ll find the idler pulley. It could lose stability or begin to wiggle, producing a squeaking sound since it is a spinning wheel.

By manually spinning the idler pulley, you can determine whether it is the cause of the squeaking sounds. You can take the pulley off of its bracket and swap it out for a new one once you’ve ascertained that the pulley is what’s causing the squeak. You must put the belt and the other components back in their place once you’re done.

After reading the dryer’s instruction manual, you may replace an idler pulley without much difficulty. The difficult aspect may be finding one that is functional with your dryer since you should not settle for any substitute which gets your way.

Damaged, noisy motor

It could be preferable to purchase a new motor if your current one is noisy. However, purchasing a new motor would be quite expensive, in addition to paying for the electrician’s services. The best possible solution might be to replace your squeaky dryer with a new one if its motor is noisy.

However, you should buy a new motor if you are determined to fix the problem. Finding a motor that is a perfect match for your dryer will be the most difficult part. Once you have one, you might need to remove the rear panel of your dryer by unscrewing the screws at the dryer’s back. Work until you’ve removed everything that’s impeding access to the motor.

After accessing, detach it so that you may start the replacement procedure.

Get the motor replaced, then assemble each component in reverse order. It may be better to seek professional assistance if you’re replacing a motor because it might be somewhat complicated.
It would be wise to get a new motor if you discover that yours is beyond fixing.

Fan or blower wheel

When heated, the blower fan, which is a wheel made of metal, nylon, or plastic, sucks air into the dryer. The hot air is forced through the drum and out of the vent by the fan. Over time, the blower fan may accumulate lint or debris. That could cause damage to the fan, thus making a squealing noise.

You should check your blower wheel from the dryer’s back if you think it’s the source of the squeaky sounds. For the fan to suck air in, most dryers feature a vented access panel at the bottom of the dryer back. If necessary, remove it, clean it, check the fan’s rotation, and ascertain whether it’s creating any undesirable noises.

Conclusion

Now you know, How to Fix a Squeaky Dryer by yourself. The dryer is a necessary item in the majority of households, and with proper care, it might last for many years. You should be concerned if you have a squeaky dryer since it could be a sign of something more serious.

The fact that there aren’t many moving parts in a dryer makes it easier to pinpoint the source of the squeals. As soon as you determine the causes, fix, or replace the problematic parts. Because failing to do so may necessitate replacing the dryer entirely.

But it is always recommended that you must call your nearest experts who know How to Fix a Squeaky Dryer efficiently.

How To Repair A Leaking Washing Machine

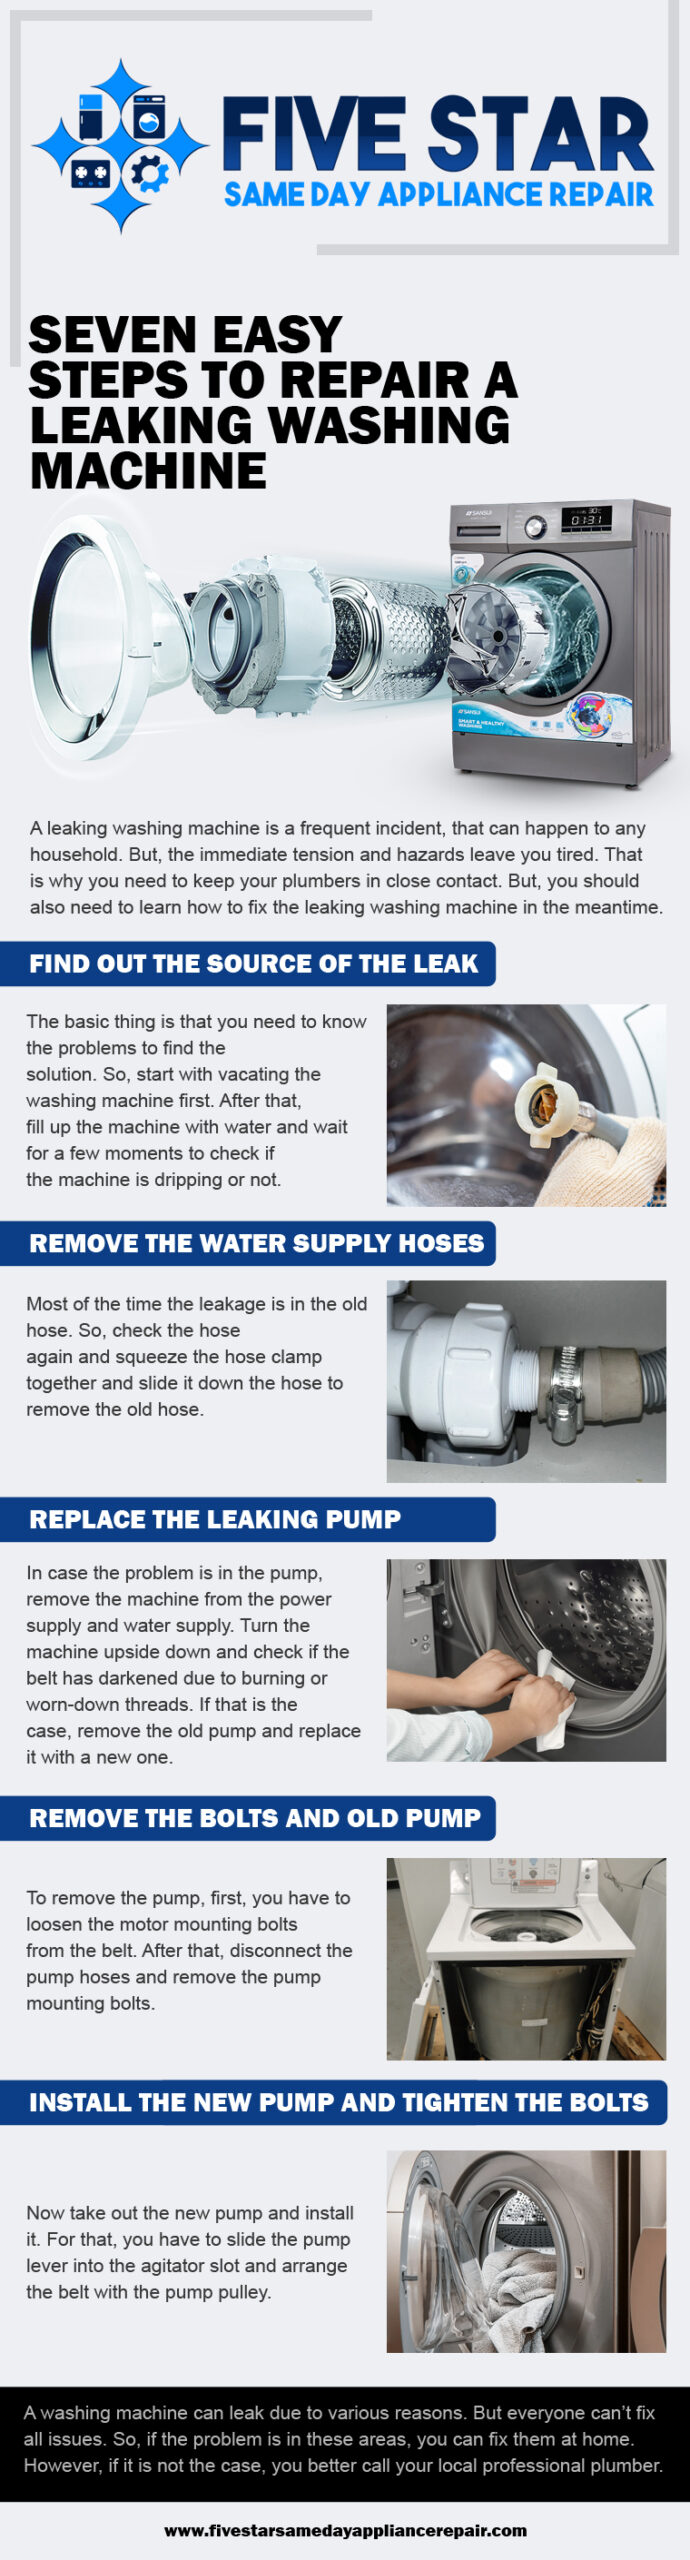
How To Repair A Leaking Washing Machine? Seven Easy Steps

By Washing Machine Repair

Washing machines are an integral part of every household. But, what happens when the washing machine takes a break? On top of that, leaving additional workload upon you? Well, we meant water leaking from the machine. What are you going to do to fix a leaking washing machine?

A leaking washing machine is a frequent incident, that can happen to any household. But, the immediate tension and hazards leave you tired. That is why you need to keep your plumbers in close contact. But, you should also need to learn how to fix the leaking washing machine in the meantime. After all, the situation may not fall under your convenience. Before that, you need to know the tools and materials that you may need for the fixing.

water leaking

Things required for fixing a leaking washing machine

Not being a professional plumber, you cannot retain professional tools. But, you can keep these things and they are easily available within your nearby local markets.

  • Adjustable wrench
  • Hammer
  • Slip joint pliers
  • Socket/ratchet set
  • Putty knife
  • 4-in-1 screwdriver
  • Washing parts (replacements for the broken/damaged parts)

How to fix it?

A leaking washing machine can be for various reasons. But, everyone can’t solve all the problems. That is why we will explain the simplest reason for a leaking washing machine and how to fix that in seven easy steps.

1. Find out the source of the leak

The basic thing is that you need to know the problems to find the solution. So, start with vacating the washing machine first. After that, fill up the machine with water and wait for a few moments to check if the machine is dripping or not. Now stop the water flow and replace the rusted hoses with new ones. And if the hoses are in good shape and condition, replace the internal washers only.

2. Remove the water supply hoses

Now you need to turn off the main source of the water or shut off the valve. You have to unscrew the supply hoses from the back of the machine with adjustable pliers. Take out the old hose washers with the screwdriver. After that, install new gaskets in both hoses and reconnect the supply lines.

3. Check the inside of the machine

Now, you need to check the inside of the washing machine thoroughly. So that the supply hoses are not leaking, you need to check the different parts. Reconnect to the power and remove the access panel from the back of the machine or open the cabinet. Again check for leaks by filling the water. If you can’t spot any leakage, turn the machine to the agitate cycle and check again.

4. Remove the old hose

Most of the time the leakage is in the old hose. So, check the hose again and squeeze the hose clamp together and slide it down the hose to remove the old hose. Now replace the hose with an identical part.

5. Replace the leaking pump

In case the problem is in the pump, remove the machine from the power supply and water supply. Turn the machine upside down and check if the belt has darkened due to burning or worn-down threads. If that is the case, remove the old pump and replace it with a new one.

6. Remove the bolts and old pump

To remove the pump, first, you have to loosen the motor mounting bolts from the belt. After that, disconnect the pump hoses and remove the pump mounting bolts. Now you need to tip the pump pulley away from the belt and make the pump lose.

7. Install the new pump and tighten the bolts

Now take out the new pump and install it. For that, you have to slide the pump lever into the agitator slot and arrange the belt with the pump pulley. Now, adjust the bolt holes and tighten the mounting bolts, followed by connecting all the hoses and clamps.

A washing machine can leak due to various reasons. But everyone can’t fix all issues. So, if the problem is in these areas, you can fix them at home. However, if it is not the case, you better call your local professional plumber.