Tag

appliance repair

washing machine filter

Washing Machine Filter: Keep Your Laundry Clean and Fresh

By Appliance Maintenance

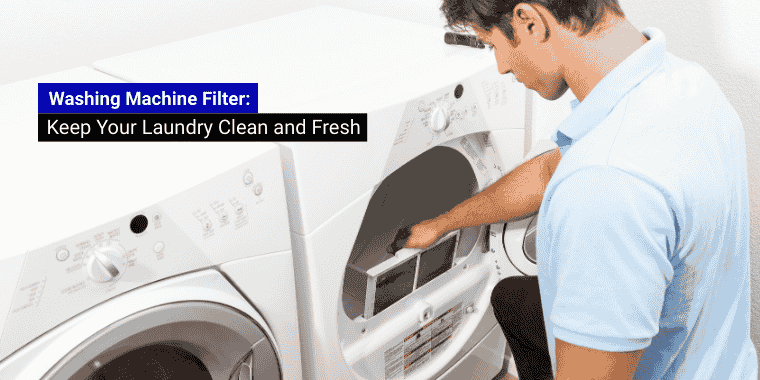
Your washing machine does a lot of work for your home. It cleans clothes, towels, and sheets every week. However, many people forget an important part: the washing machine filter. This small part traps lint, dirt, and tiny debris from your laundry. If the filter gets clogged, your washer might not clean clothes well. Therefore, checking and cleaning the filter regularly helps your washer work well and keeps clothes fresh. Keeping the filter clean helps your washing machine work for many more years. Regular care prevents costly repairs and keeps laundry day easy.

Why the Washing Machine Filter Matters?

The filter is not just a small accessory. It protects your machine from blockages. When the filter is dirty, water drains slowly. This can make your laundry less clean than usual. Consequently, laundry takes longer and may smell bad.
Moreover, a clean filter keeps the motor and pump safe. It also prevents excess wear. Taking care of your washer regularly keeps it working well for a long time. To prevent frequent repairs, cleaning and maintaining the filter is an easy step. You can also get help from a washing machine repairman if needed.

Signs Your Washer Needs Cleaning

If your clothes are not getting clean, check the filter. Other signs include strange noises, leaks, or water not draining. Acting early can help prevent bigger problems.

  • Clothes stay wet after the cycle
  • Washer makes unusual sounds
  • Water backs up during cycles
  • Bad smell from the drum

Cleaning the washing machine filter is simple. You can remove lint and rinse it under water. In addition, regular cleaning improves washing performance and extends machine life.

How to Clean the Washing Machine Filter?

First, turn off the washer. Then, locate the filter—usually at the bottom or behind a panel. Remove it carefully and rinse it under running water to remove debris. Doing this regularly prevents clogs and keeps water flowing smoothly. Next, check the filter housing for dirt and wipe it clean before replacing the filter.
Lastly, ensure the filter is secured properly to prevent any leaks. If you are unsure, you can follow some simple washing machine repair tips to clean it safely. Cleaning the filter regularly protects your machine and keeps laundry fresh. It also helps your washer last longer and saves you from costly repairs.

Benefits of Regular Maintenance

Regular maintenance of your washer brings many advantages. It keeps the machine running smoothly and prevents issues.

  • Keeps clothes fresh and clean every wash
  • Prevents bad smells from building up in the washer
  • Helps the washing machine work more efficiently
  • Extends the life of your washing machine filter

By following these simple steps often, you save money and avoid problems. Also, laundry day becomes easier and less stressful.

Final Thoughts: Keep Your Laundry Fresh

Always check the filter for a cleaner wash. A simple cleaning routine improves your washing machine’s performance and prevents blockages. Furthermore, following small maintenance steps ensures your washer runs smoothly for years.
By paying attention to your washing machine filter, you avoid repairs and enjoy fresh, clean clothes every day. So, whether you follow simple cleaning tips or consult a washing machine repair man, regular care is the key. A clean filter makes doing laundry easier and less stressful.

Samsung dryer not heating

Why Is Your Samsung Dryer Not Heating? Easy Fixes You Can Try

By dryer repair tips

Doing laundry can get frustrating when your Samsung dryer not heating causes your clothes to stay damp. You put your wet clothes in, press start, and wait—only to find them still wet after the cycle ends. The good news is that many times, this issue is easy to fix. Often, it could be a wrong setting or a blocked vent causing the problem. Sometimes, a heating part inside the dryer might have worn out or broken.

Start by checking the heat settings on your dryer. Also, be sure to clean out the lint screen and vents. These simple steps often fix the problem. If your dryer still isn’t heating, it’s a good idea to get help from a professional. Don’t worry—most dryer troubles are minor and can be fixed with a few easy steps to get your clothes dry and warm again.

Common Reasons Why Your Samsung Dryer Not Heating

If your Samsung dryer not heating properly, try these simple checks first. They’re quick and can save you a service call:

  • Check the power plug: Make sure it’s fully plugged in. A loose connection can stop the heating part from working.
  • Test the outlet: Sometimes, the outlet powers the drum motor but not the heater. Plug another device in to make sure the outlet works properly.
  • Reset the circuit breaker: If the breaker has tripped, it may have cut power to just the heating element. Switch it off and back on to reset.
  • Check your dryer settings: Avoid no-heat options like “Air Fluff” or “No Heat.” Choose a heat setting such as “High Heat” and try again.

Samsung Dryer Not Heating? Check These Faulty Heating Parts

If your Samsung dryer not heating issue continues, the heating element may be damaged. This component heats the air inside the drum, and it can fail over time. When broken, the dryer drum will turn, but no warm air is produced. Replacing this part requires tools and caution, so only do this if you’re comfortable.
Another part that might be causing trouble is the thermal fuse. This small safety device stops the dryer from overheating. If the fuse blows, the dryer might run but won’t heat up. This often happens when vents are clogged or the dryer overheats. Fixing it means replacing the fuse with a new one.

When to Call a Dryer Repair Expert?

If you have tried all the basic fixes and your Samsung dryer not heating problem still isn’t resolved, it’s best to contact a professional dryer repair technician. Some problems are hard to detect and need special equipment. Experts know how to test all parts carefully and find the cause quickly. Since they repair dryers regularly, they can fix it faster and safer than trying to do it yourself.
Also, if you don’t know how to safely open or repair your dryer, let a professional handle it. Some parts inside can be sharp or carry electricity, and mistakes could cause injury or damage. It’s wise to reach out to trusted dryer repair services, ask any questions, and schedule an appointment. This way, your dryer will work properly again, and you’ll avoid bigger issues later.

Cleaning Can Prevent Major Dryer Problems

A very common reason for a Samsung dryer not heating is clogged vents. When lint blocks airflow, the dryer may automatically shut off the heat to avoid overheating. This causes clothes to take longer to dry and can strain your dryer.
Be sure to clean the lint filter after every load—it only takes a few seconds. Also, clean the vent pipe monthly to keep air flowing well. This simple step helps prevent serious problems and reduces the chances of needing appliance repair in the future.

blinking normal light

Blinking Normal Light: What It Means and What You Should Do?

By dishwasher fix

Have you ever walked into the kitchen and seen a flashing light on your dishwasher? It can be confusing, especially if your dishes aren’t clean. If you notice a blinking normal light, it usually means your dishwasher is trying to tell you something is wrong. But don’t worry—this is easy to understand and fix, step by step!

Why Is the Blinking Normal Light Flashing?

When you see the blinking light, it means the dishwasher has found a problem. Often, it’s just a minor issue. For example, the door might not be closed all the way. Or, there could be water inside that isn’t draining.
Sometimes, the machine stops in the middle of a wash because something went wrong. But instead of staying quiet, it blinks to show you it needs help. This light is like a little helper saying, “Hey! Please check on me!”

What Can You Do About the Blinking Normal Light?

First, don’t panic. The best thing to do is to press the “Start/Reset” button and wait a few minutes. Many times, the dishwasher just needs a fresh start. If that doesn’t work, try turning off the power for 2–3 minutes and turning it back on.
If the light keeps blinking, it may mean something else is causing trouble. Maybe food is stuck in the filter, or the drain hose is blocked. In that case, you can try cleaning the parts or checking for anything that looks out of place.
But if you’re still unsure, the safest option is to ask for help. There are helpful dishwasher repair services that can come to your home and fix the problem quickly. That way, you don’t have to guess or take apart anything by yourself.

How to Avoid This Problem Next Time?

To stop the blinking normal light from coming back, there are easy things you can do. Make sure the door is fully closed before starting the wash cycle. Also, it helps to rinse off big food pieces from plates before placing them inside.
In addition, cleaning the filter once a week keeps the water flowing properly. Taking care of your dishwasher can make it work better for a long time.

Flashing Light, Easy Fix!

Even though a blinking normal light may seem scary at first, it’s really just a way your dishwasher asks for help. In many cases, the solution is straightforward. Whether you press reset, check the filter, or call in a pro, you’re already on the right track. With the right steps and a little care, your dishwasher will be back to normal in no time!

KitchenAid Dishwasher Troubleshooting

Ultimate KitchenAid Dishwasher Troubleshooting Checklist

By Dishwasher problems

Having issues with your KitchenAid dishwasher? Well, it’s okay because you are not the only one. People use dishwashers frequently, but they can occasionally encounter problems. Fortunately, you can solve most problems through several proper measures. Below is your KitchenAid Dishwasher Troubleshooting checklist that will help you find your way around the most widespread problems and their solutions.

KitchenAid Dishwasher Troubleshooting: Identify and Fix Issues

Dishwasher Won’t Start

In diagnosing a dishwasher that will not start, initially, there are a few things to do.

  • Additionally, make sure the power supply is connected correctly.
  • Ensure the door shuts and locks properly.
  • You can look for circuit breakers that have tripped or blown fuses.

Finally, the control panel might show some mistakes that need to be fixed. If none of those things fix the problem, try turning the dishwasher off and on again.

Dishwasher Not Draining

A clogged drain causes water to pool in your sink, leading to potential mess and inconvenience.

  • Check to make sure this hose is not obstructed.
  • Some of these may trap debris; clean the filter in this case.
  • Take a look at the garbage disposal connection.

Regular maintenance keeps each drainage system area free and open.

Dishes Aren’t Getting Clean

If dishes come out dirty, the following may help:

  • Pull out the lower spray arm and check/clean the area around the round seal to see if there are any blockages.
  • Take proper detergent, and use the required quantities.
  • Make sure the water is at the proper temperature(120F degrees being the right temperature).

You should not overload the dishwasher you are using in addition to that. This can close passages through which the water has to flow and restrict cleaning effectiveness.

Dishwasher Leaking Water

Leaking can be very inconvenient, but fortunately, this is usually a solvable issue.

  • It is necessary to check a door gasket for signs of wear or damage.
  • There should not be overloading since it leads to spilling over.
  • Level the dishwasher properly.

Also, check the hose connection area for any signs of looseness. People normally tighten these to seal leaks in many cases.

The Bottom Line

All in all, a constant check is essential to prevent difficulties. Below is a KitchenAid Dishwasher Troubleshooting checklist comprising possible problems and how to address them. Alternatively, if your dishwasher is still not working, contact a professional dishwasher servicing company for assistance that may be required.

Petty concerns should not disrupt your kitchen operations. Therefore, you should refer to this KitchenAid Dishwasher Troubleshooting guide to maintain your appliance properly. With just a bit of care, you can ensure it stays in good condition and continues to serve you well for years to come!

appliance care

Smart Appliance Care Tips for Humid Summer Breakdowns

By Appliance Maintenance

Higher humidity levels and summer bring bad news for your appliance. Why are we saying that? Because they invite many problems that homeowners often overlook. What’s the good thing? A problem never comes without a solution. And so, we came up with appliance care solutions to fight humid conditions. Let’s read

No Damp Drama: Tips for Moisture-Free Appliances

You can blame humidity for pulling moisture into the air. This moisture usually settles in poorly ventilated areas like garages or basements. And that invites problems of electrical damage and rust. Now, how can these problems become dangerous? They can become the reason behind your appliance breakdown.

Solution: Use dehumidifiers where your appliance stays to lower moisture levels. These areas also need good airflow with proper ventilation and exhaust fans. Next, regularly wipe down the appliance surface using a dry cloth to clear moisture.

Appliance Care Checklist: Gaskets and Seals Matter

The rubber gaskets and seals of your appliances stay in danger because of humidity. That’s because this humidity can cause wear and tear. So, what happens when warm air and moisture go inside an appliance? If you said appliance breakdown, you guessed it right.

Solution: Your appliance care is incomplete without regular seal checks. Next, use a damp cloth to clean those seals. If the seals face any damage, replace them quickly.

Spark-Proof Your Appliances: Electrical Safety Tips

High humidity levels can lead to increased electrical problems. Specifically, excessive moisture can create pathways for electrical short circuits. As a result, this significantly increases the risk of electrical fires and equipment breakdowns.

Solution: Choose surge protectors to safeguard your appliances from power surges. Next, inspect the condition of the electrical plugs and cords. If you notice any signs of fraying or damage, be sure to replace them promptly. Additionally, place your appliances on a shelf to prevent contact with the humid floor.

Maintain to Sustain: Routine Care for Longevity

So, how can you regularly maintain your appliance for its smooth operation?

Solution: Start with professional checks every year. That will save you more energy bills in the future. Keep cleaning the coils and filters of appliances to remove moisture and dust. And remember, any unusual noise can be a sign of damage, so call professionals quickly.

Weight Watchers: Appliance Care for a Lighter Load

More guests mean more load on your appliances for laundry or food. And what’s the result? Your appliances will likely face overheating problems, mostly in humid conditions.

Solution: You can easily keep track of load sizes by referring to the user manual. Additionally, give your appliance a break to avoid overheating. We have a bonus tip for you. The load can be greatly reduced when you switch your appliance to energy-saving or eco mode.

The last thing we have for you is awareness. If you notice any damage signs, contact an appliance repair professional. And follow these appliance care tips to avoid unnecessary summer breakdowns.

oven-repair-guide

Oven Repair Guide – Decoding Common Oven Issues and Unveiling the Best Solutions to Fix Them

By Oven Repair Guide

An oven is a precious addition to your kitchen. It makes cooking easy, effortless, and enjoyable. Further, you can experiment with baking, toasting, and grilling and enjoy delicious food you have never tasted. However, you cannot expect your oven to last forever. Over time, constant working leads to wear and tear and malfunctioning. This oven repair guide discusses the most common oven issues and their solutions.

Oven Repair Guide for Common Oven Issues

Inefficient Cooking

Many people complain that the food doesn’t taste as good as it used to be. It suggests that the cooking prowess of the oven has come down drastically. What could be the reason? Most probably, the heating element is causing the difficulties.

How to solve this issue? Turn off the power before loosening the screws of the heating element to check thoroughly. If it seems faulty, replace it with a new one. If you have doubts, contact an appliance repair specialist to perform this task.

Unusual Temperature Variations

Under normal circumstances, the oven produces consistent heat to promote even cooking. A faulty thermostat or sensor can make the temperature inconsistent. It is a common issue that people encounter gradually over time.

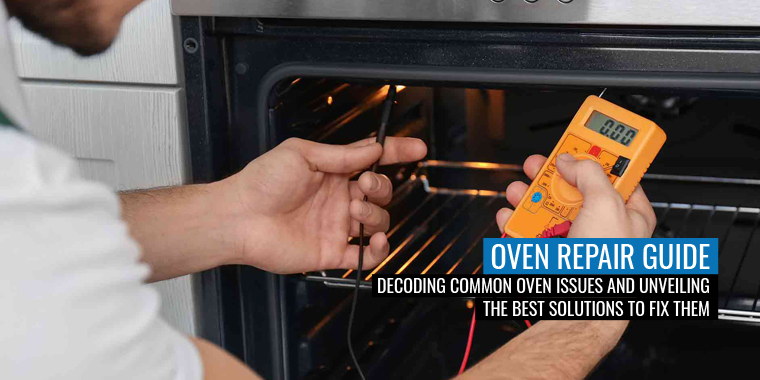
Any oven repair guide would recommend recalibration. Thermometers can help you with that. Follow the guidelines of the manufacturer to ensure proper temperature calibration. If it does not address the issue, examine the sensor. Make sure that it is not in contact with the heating element. Moreover, you can use an ohmmeter to assess the condition of the sensor. Replace the damaged sensor if needed.

Jammed Door

A jammed door can disrupt your cooking schedule. If the door does not close tightly, you cannot expect 100% efficiency.

Switch off the oven for a few minutes when you experience the jammed door issue. Disconnect the plug from the power source. Once it cools down, switch on the oven again to check if the problem is solved. If it does not, take out the door from the hinges. Examine the springs and hinges closely. If you notice any damaged component, replace it to solve the issue.

Failing to Power Up

Sometimes, your oven may refuse to turn on. It can be frustrating, especially in the morning. An electrical problem could be the possible reason. A defective ignitor can also cause this problem.

Do you have a gas oven? Then, check whether the range ignites or not. If the range fails to ignite correctly, opting for a replacement is the optimal solution. If there’s no response from either source, it’s advisable to seek professional assistance as the issue may lie within the gas line.

Are you using an electric oven?

Look at the unit to see whether it is drawing power. If you see an inactive display, the circuit must be reset at the breaker. Sometimes, the light may turn on without heating the oven. It suggests internal wiring or heating element issues.

These are the most common issues and solutions you can come across in an oven repair guide. Contact an experienced oven repair expert to solve more complex issues.

energy-saving-tips

7 Energy-Saving Tips For Your Home Appliances

By energy saving tips

There are energy-saving tips for home appliances. We start with daily small actions to larger ones that benefit the environment and lower energy costs. Learn how to use energy more wisely and effectively to increase energy efficiency and discover where energy is wasted. More than merely conserving energy is involved in this. Here are some of the best energy-saving tips for making your house or place of business more energy-efficient.

Some Best Energy Saving Tips

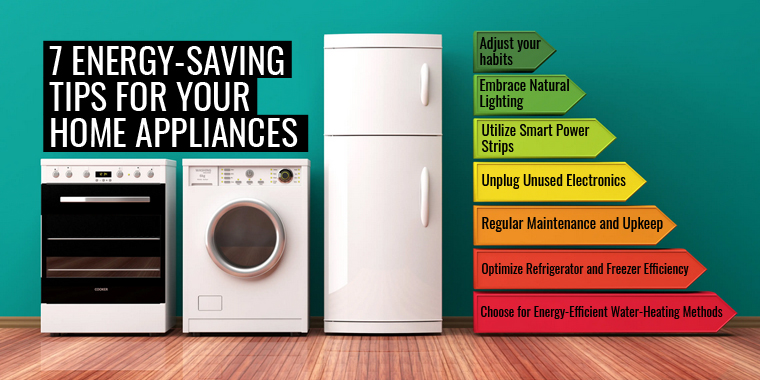
  1. Adjust your habits:

Having good energy-saving products doesn’t give you the best outcome; you only need to adjust your daily habits. For example:

  • Shutting off lights or appliances when not in use can help conserve energy.
  • You may also use energy-intensive equipment less by carrying out household chores by hand, such as washing dishes or hanging up your clothing to dry instead of using a dryer.
  • You may use energy monitoring tools to determine where the majority of the electricity in your house is being used.

You may modify which appliances consume the most power each day with this.

2. Embrace Natural Lighting:

Maximize natural lighting in your home to reduce reliance on artificial lighting.

  • Open your drapes, blinds, and shades during the day to let light into your rooms.
  • You can switch to LED light bulbs, which consume less energy and last longer than conventional incandescent bulbs.

This is one of many solutions, but it saves quite a bit.

3. Utilize Smart Power Strips:

Many electronic devices continue to draw power even when turned off or in standby mode.

  • By using energy-saving tips, you can prevent this phantom energy loss.
  • Intelligent power strips detect when devices are not in use and automatically cut off the power, reducing standby power consumption.

This simple solution can significantly affect your energy consumption and reduce electricity bills.

4. Unplug Unused Electronics:

Electronics and appliances consume energy when plugged in, even when not in use.

  • Unplug devices without use or use power strips to switch off multiple devices at once effortlessly to prevent this standby power usage.
  • Common culprits include phone chargers, laptops, gaming consoles, and kitchen appliances.

Adopting this practice can minimize wasted energy and reduce your carbon footprint.

5. Regular Maintenance and Upkeep:

Proper maintenance of your home appliances ensures optimal energy efficiency, can do this way:

  • Clean or replace air filters in air conditioners and heating systems regularly to facilitate better airflow and reduce energy consumption.
  • Similarly, cleaning the lint trap and dryer vents enhances the efficiency of your clothes dryer.

Pay attention to the maintenance recommendations provided by the manufacturers to keep your appliances running smoothly and efficiently.

6. Optimize Refrigerator and Freezer Efficiency:

To enhance your refrigerator and freezer’s energy efficiency:

  • Ensure proper airflow around the appliances.
  • Leave sufficient space behind and around them to allow heat dissipation.
  • Regularly defrost manual-defrost freezers to maintain efficiency, as excess ice build-up can impede performance.
  • Organize the contents of your refrigerator and freezer efficiently to minimize the loss of cold air when you open the doors.

This way, your appliances will consume less energy to maintain the desired temperature.

7. Choose for Energy-Efficient Water-Heating Methods:

Water heating is one of the energy-saving tips where you can save energy. Here are the following:

  • Insulate your hot water storage tank and pipes to reduce heat loss during distribution.
  •  Consider installing low-flow shower heads and faucets to minimize hot water usage.
  • If you have a dishwasher, use the energy-saving mode whenever possible, or wash dishes by hand using a water basin instead.

By adopting these practices, you can conserve energy and lower water heating costs.

When you start paying attention to your behavior, your need, and your home environment, you will surely get the vision of how you save energy. You’ll see a change immediately if you put some of our above energy-saving tips to use while saving power at home. In addition to lowering your power cost, you’ll also be helping the environment by lowering your carbon impact.