Your washing machine does a lot of work for your home. It cleans clothes, towels, and sheets every week. However, many people forget an important part: the washing machine filter. This small part traps lint, dirt, and tiny debris from your laundry. If the filter gets clogged, your washer might not clean clothes well. Therefore, checking and cleaning the filter regularly helps your washer work well and keeps clothes fresh. Keeping the filter clean helps your washing machine work for many more years. Regular care prevents costly repairs and keeps laundry day easy.
Why the Washing Machine Filter Matters?
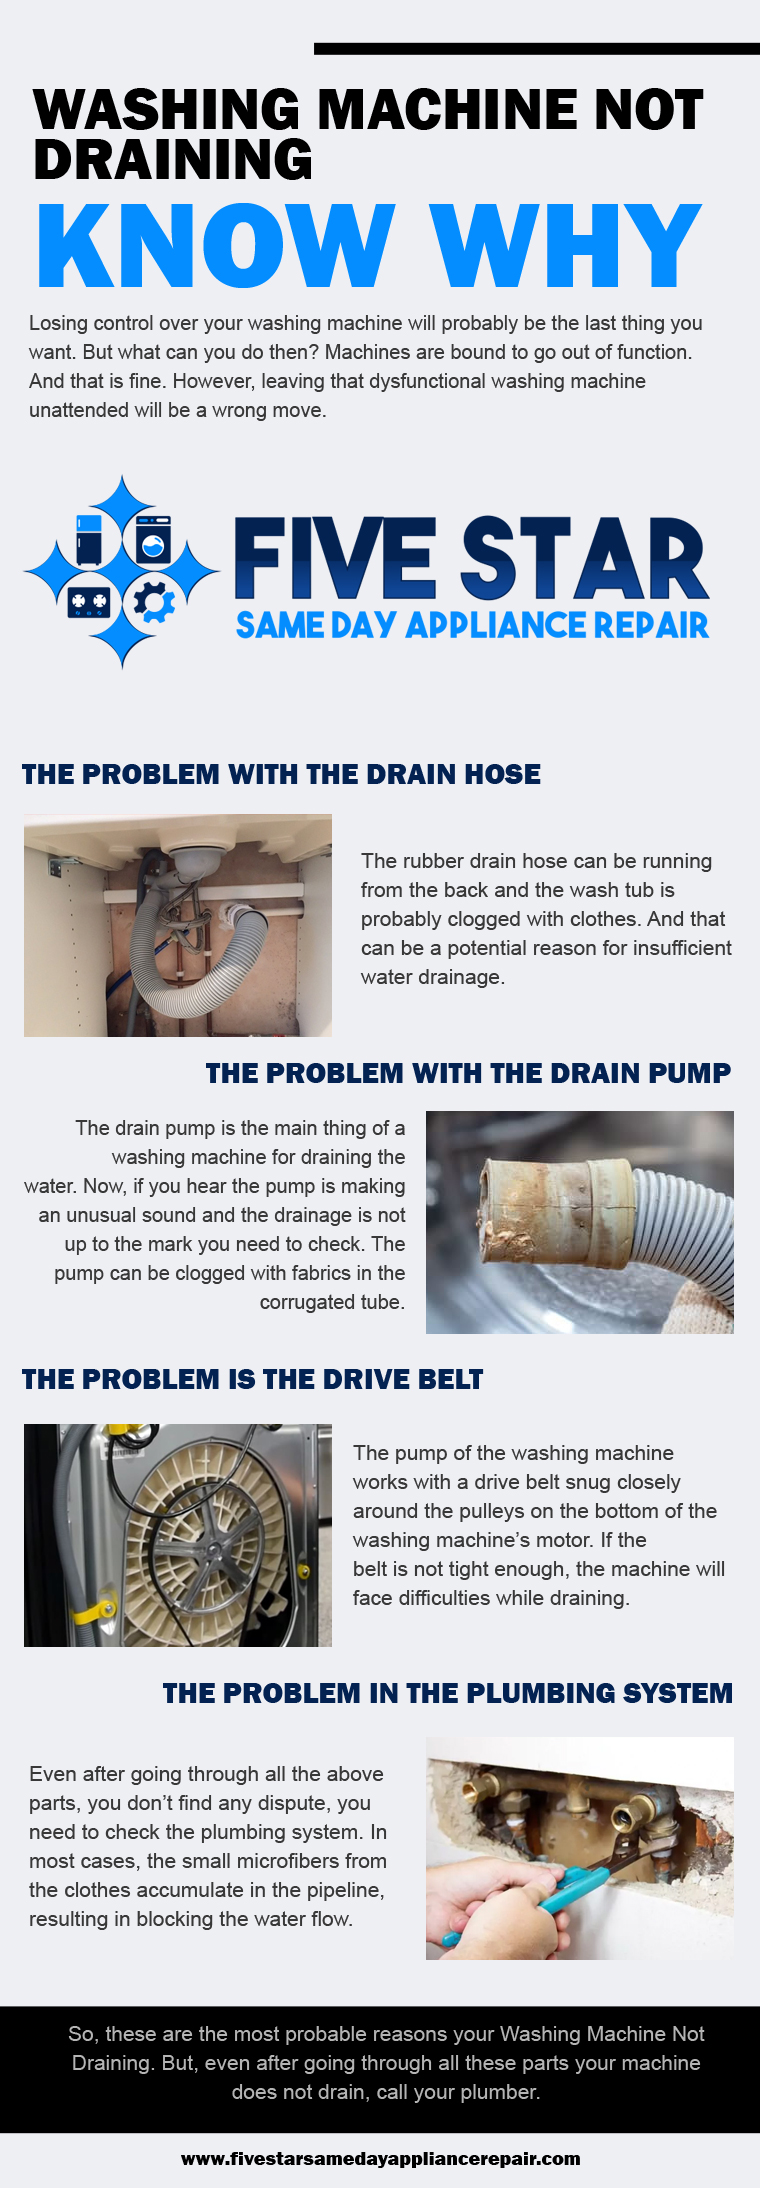
The filter is not just a small accessory. It protects your machine from blockages. When the filter is dirty, water drains slowly. This can make your laundry less clean than usual. Consequently, laundry takes longer and may smell bad.
Moreover, a clean filter keeps the motor and pump safe. It also prevents excess wear. Taking care of your washer regularly keeps it working well for a long time. To prevent frequent repairs, cleaning and maintaining the filter is an easy step. You can also get help from a washing machine repairman if needed.
Signs Your Washer Needs Cleaning
If your clothes are not getting clean, check the filter. Other signs include strange noises, leaks, or water not draining. Acting early can help prevent bigger problems.
- Clothes stay wet after the cycle
- Washer makes unusual sounds
- Water backs up during cycles
- Bad smell from the drum
Cleaning the washing machine filter is simple. You can remove lint and rinse it under water. In addition, regular cleaning improves washing performance and extends machine life.
How to Clean the Washing Machine Filter?
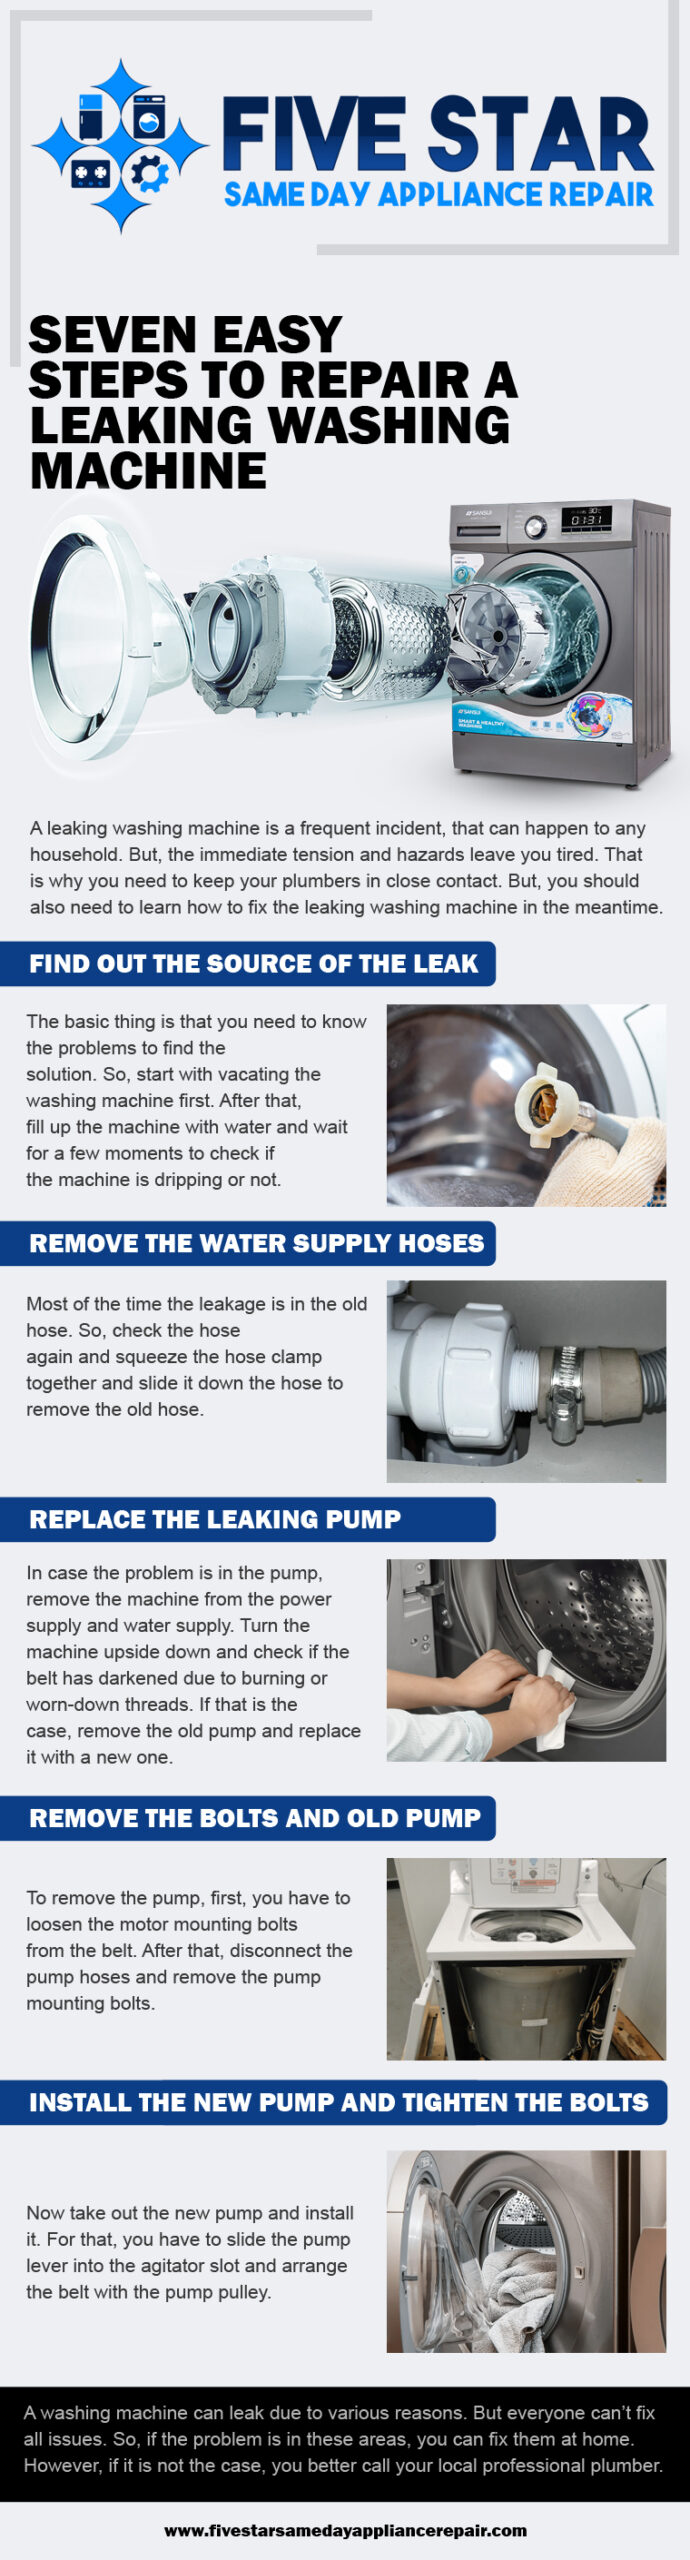
First, turn off the washer. Then, locate the filter—usually at the bottom or behind a panel. Remove it carefully and rinse it under running water to remove debris. Doing this regularly prevents clogs and keeps water flowing smoothly. Next, check the filter housing for dirt and wipe it clean before replacing the filter.
Lastly, ensure the filter is secured properly to prevent any leaks. If you are unsure, you can follow some simple washing machine repair tips to clean it safely. Cleaning the filter regularly protects your machine and keeps laundry fresh. It also helps your washer last longer and saves you from costly repairs.
Benefits of Regular Maintenance
Regular maintenance of your washer brings many advantages. It keeps the machine running smoothly and prevents issues.
- Keeps clothes fresh and clean every wash
- Prevents bad smells from building up in the washer
- Helps the washing machine work more efficiently
- Extends the life of your washing machine filter
By following these simple steps often, you save money and avoid problems. Also, laundry day becomes easier and less stressful.
Final Thoughts: Keep Your Laundry Fresh
Always check the filter for a cleaner wash. A simple cleaning routine improves your washing machine’s performance and prevents blockages. Furthermore, following small maintenance steps ensures your washer runs smoothly for years.
By paying attention to your washing machine filter, you avoid repairs and enjoy fresh, clean clothes every day. So, whether you follow simple cleaning tips or consult a washing machine repair man, regular care is the key. A clean filter makes doing laundry easier and less stressful.